
When you setup your OpenRepeater controller some default identification settings will already be chosen; however, you may wish to customize these to your liking and to meet your local ID requirements.
There are two types of identification that you may set:
- Short Identification – The purpose of the short identification is to just announce that the station is on the air. Typically just the callsign is transmitted. The number of minutes between short identifications. For a repeater a good value is ten minutes.
- Long Identification – The purpose of the long identification is to transmit some more information about the station status. For example the time of day can be transmitted, or a more descriptive custom identification can be played. A good value here is 60 minutes.
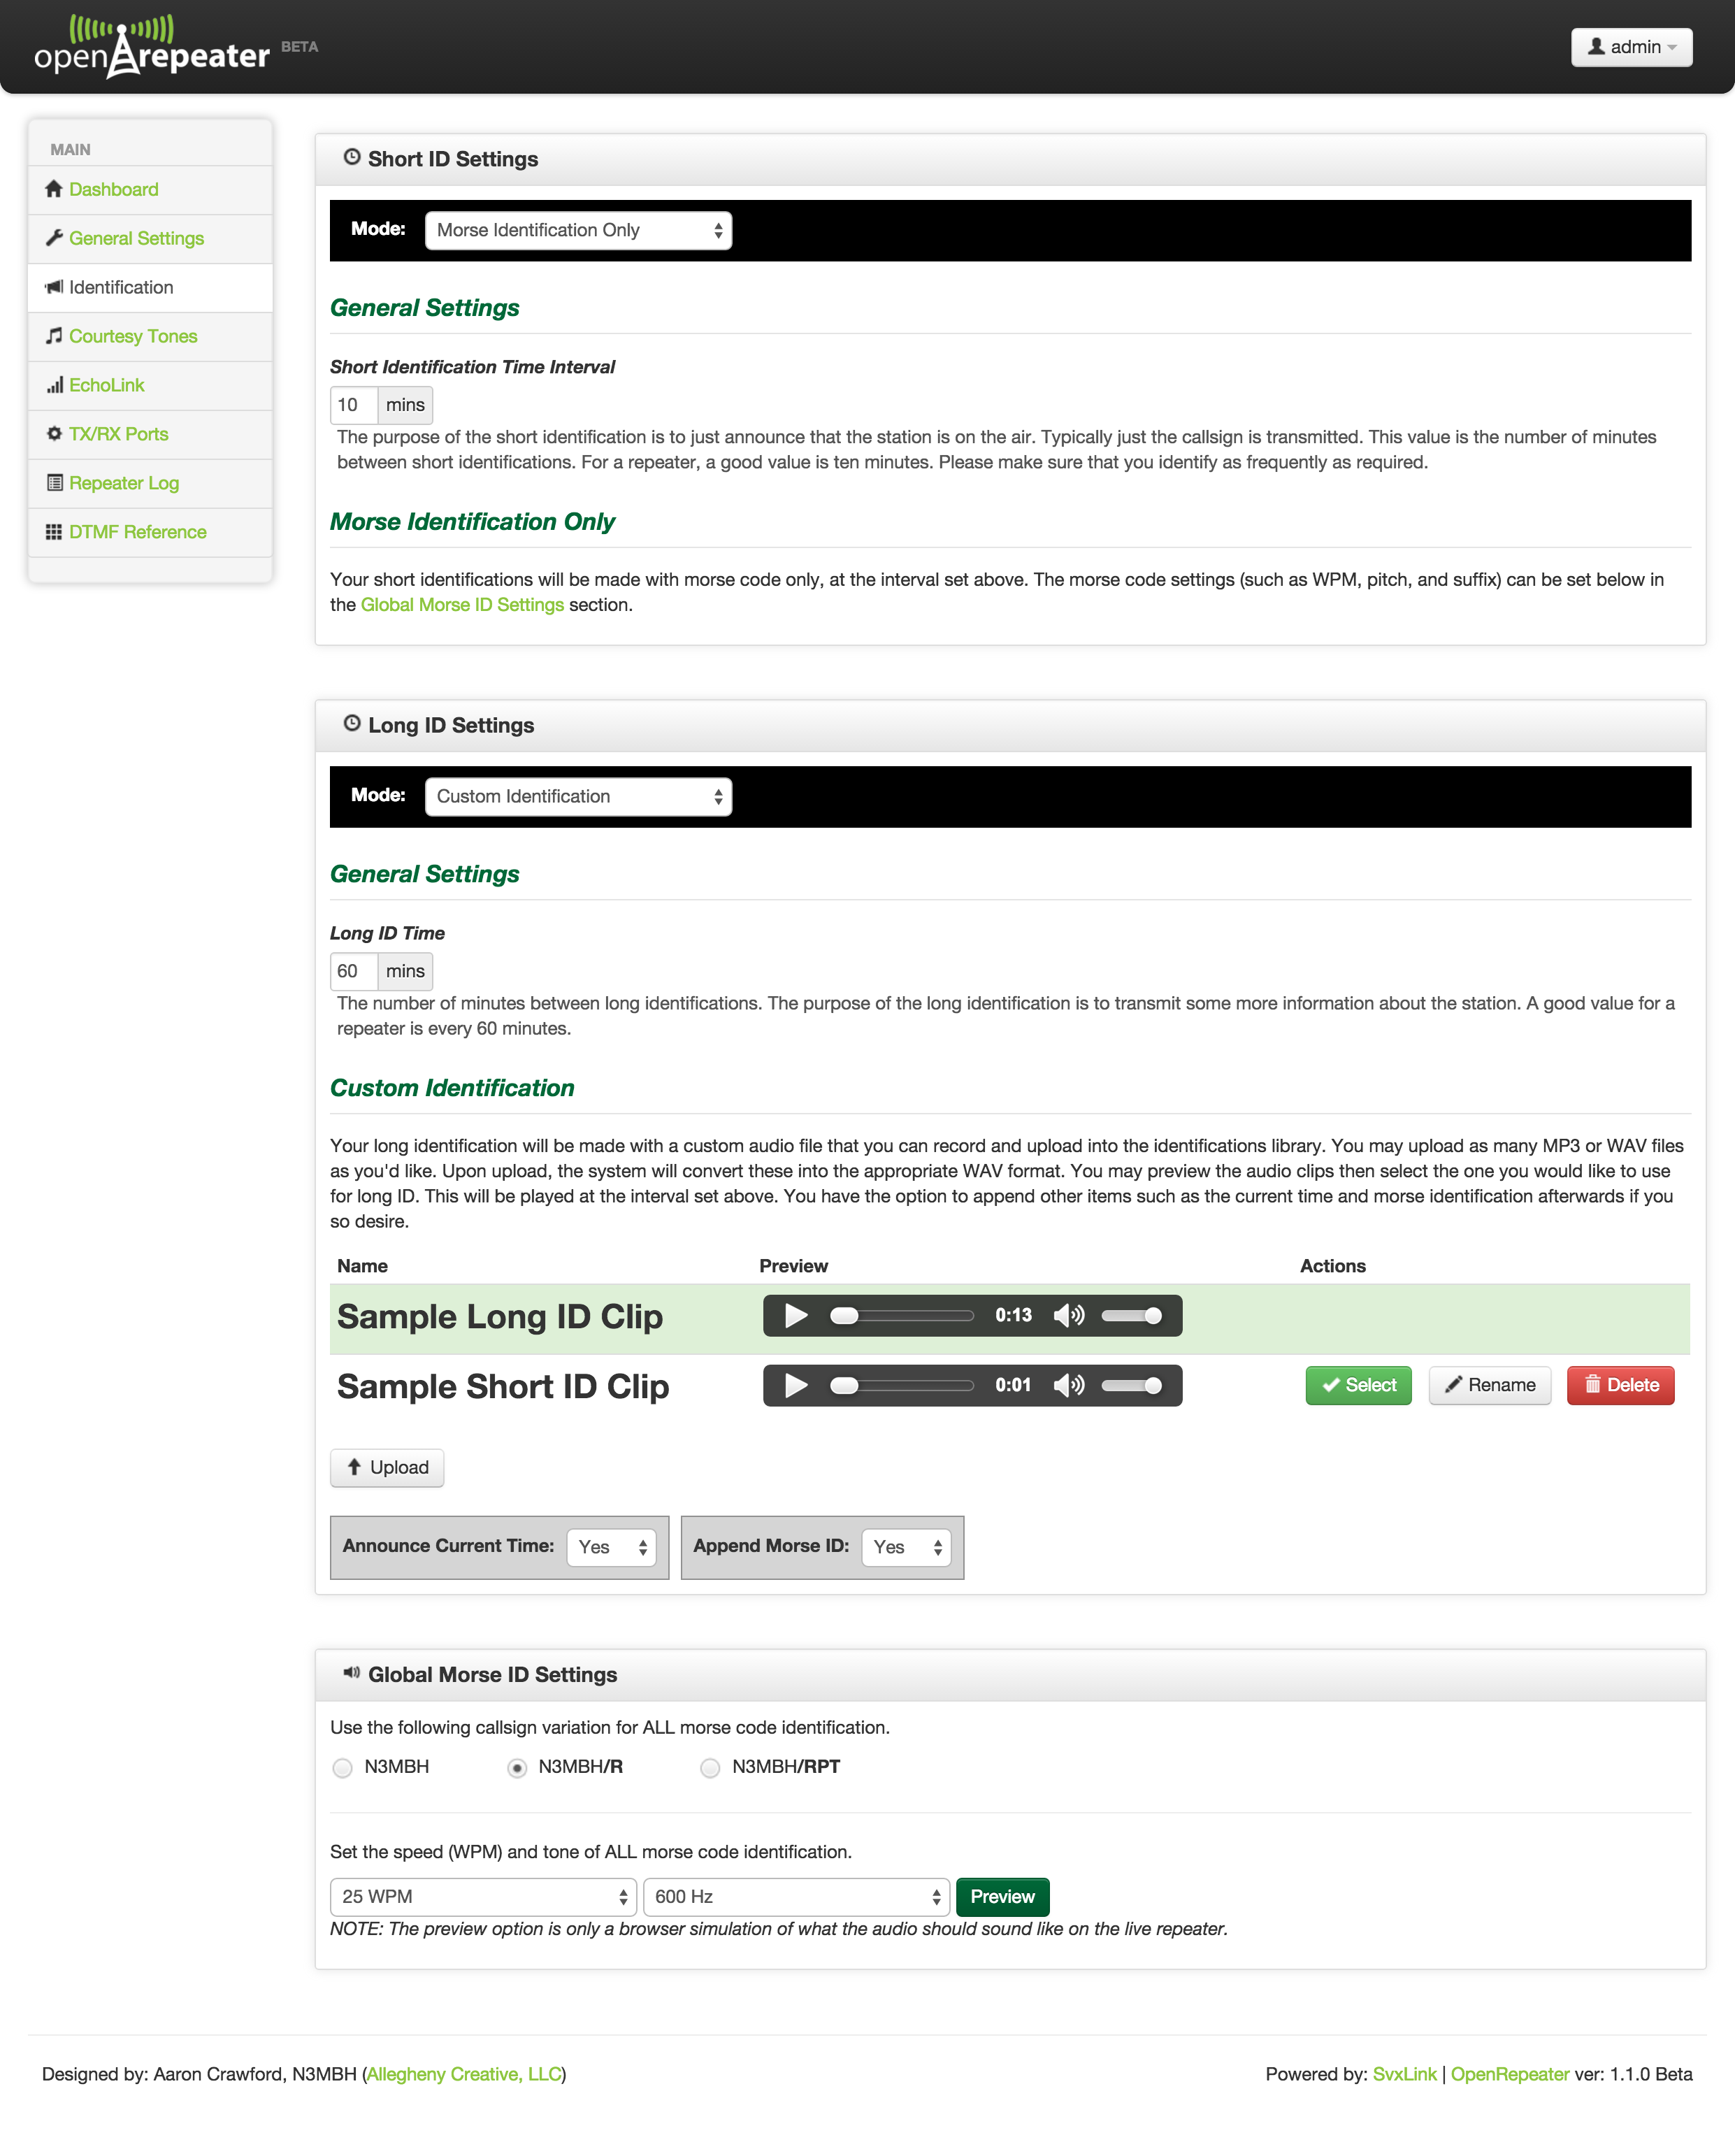
For each of the above identification types, you can choose the following modes: Morse ID Only, Voice ID, Custom ID, or disabled.
Morse Code ID has no additional options in this section beside the timing interval for each type of ID. You may set global morse code settings at the bottom of the page.
VoIce ID uses the synthesized system voice prompts to identify the repeater. The identification will be a phrase like the repeater’s callsign spelled out in phonetics followed by “repeater”. So for example if the repeater’s callsign was W1AW, then the voice ID would be “Whiskey One Alpha Whiskey Repeater”. In this mode, you also have the option to append morse ID. In the long identification type, you will have additional options not available in the short identification type like appending the current time.
Custom Identification will allow you to upload and use your own custom recorded audio files for identification. You can upload your files and they will show up in the library of custom identifications. The file should be in MP3 or WAV format and any excess ‘dead air’ should be trimmed off of the clip. DO NOT UPLOAD FILES THAT CONTAIN MUSIC, CLIPS OF MUSIC, OR OTHER COPYRIGHTED MATERIAL…IT’S ILLEGAL. OpenRepeater will do some background audio conversion to set the sample rate as it is needed for playback by the system.
Depending on the number of custom identification clips that you have stored on your system, they may be presented to you on multiple pages. There is navigation to change pages and set the number of clips that are displayed at one time You can preview what each identification clip sounds like on your web browser by clicking on the play button next to the desired clip. To select the ID clip that you’d like to use for the selected ID type, choose the select button next to the audio clip. The active clip will have an ‘active’ flag next to it in the list. You also have options to rename and delete any of the clips in the list.
In this mode, you also have the option to append morse ID. In the long identification type, you will have additional options not available in the short identification type like appending the current time.
Disabled mode will disable the selected type of identification. It is not recommended to disable both types of identification as you would have no identification. It might be desirable to disable the long identification and only use the short identification for a quieter machine.
Global Morse Identification Settings
For Morse Identification, there are global settings at the bottom of the page that affect all morse identification. You can set the WPM (Words Per Minute) and Tone/Pitch of the morse ID as well as any desired suffixes you’d like appended to the the repeater’s callsign when it IDs with morse code. There is a optional preview button that will simulate what playback of the morse ID will sound like. This option is currently only available on desktop browsers
[info_box style=”announcement”]Note: Upon updating, your settings will be saved; however, they will not become active until you choose to “Rebuild & Restart” the OpenRepeater controller. You may continue to update other settings and when you are ready to apply them to the repeater, choose the “Rebuild & Restart” button that appears at the top of the page and confirm to proceed.[/info_box]