
Chances are that your SD card is larger than the IMG file written to it when you imaged your card. To utilize all the space on the card (unpartitioned space) you will need to expand the file system to fill the entire card. Follow the steps below to complete this. Take your time to follow the instructions clearly as you can mess up the data on your card. It is usually best to perform this step right after you have imaged the card: 1) to give you the most room right away, and 2) if you do mess this up, then you can simply reimage the card without losing any customizations.
Raspberry Pi Users (Rasbian): For Raspberry Pi Images (Raspbian), you can simply use the menu driven raspi-config command at the command line and there is a expand file system option in there. For all other users please follow the instructions below.
Step 1 – Boot Up & Login as root
With the memory card inserted in your board, boot up and SSH into your board as the root user.
Step 2 – Modify the Partition Table
Enter the following commands below to use fdisk to change the partition table.
Start fdisk for the MMC card with the following command:
fdisk /dev/mmcblk0
At the fdisk prompt, enter p to display partitions. You should see something similar to the image below.

Partition 2 should be the “Linux” partition with ORP on it. Be sure to note the start sector for use in a minute. It might be a good idea to select and copy this into your clipboard if your ssh client will allow it.
Delete the Linux Partition
At the fdisk prompt, enter d to delete a partition and then press 2 to select the 2nd partition. You should receive confirmation that partition 2 has been deleted.
Note: Nothing will actually be deleted until you issue the write (w) command at the end.
Create the New Partition
Next at the fdisk prompt, enter n to create a new partition. Select p for a primary partition, and 2 to create partition 2. When prompted, enter the first sector amount above as the new sector amount, then when prompted for the last sector, hit Enter to accept the largest possible amount. Those results should look similar to this:
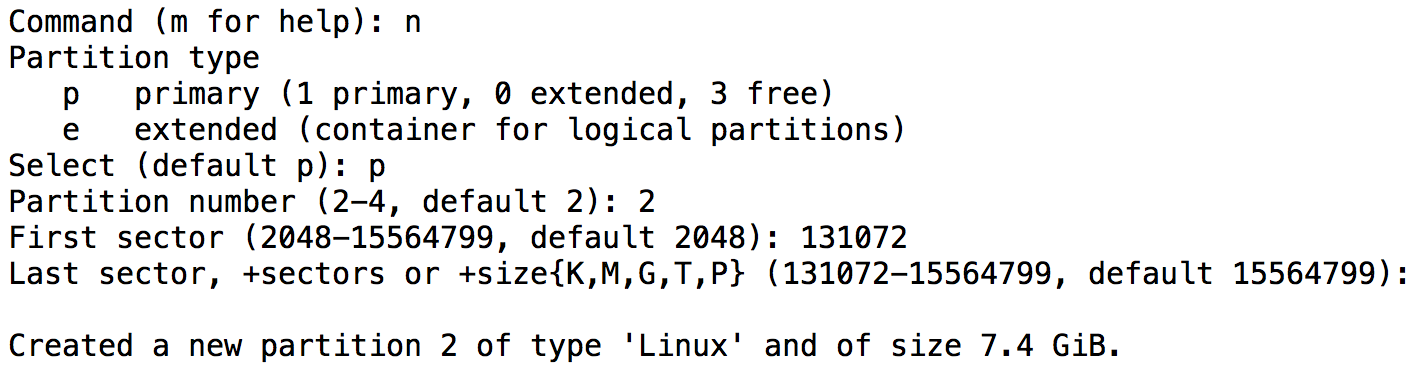
You should notice a size returned pretty close to the capacity of your card. If something doesn’t look correct, then hit q to quit without saving the chagnes. Otherwise, press w to write this information.
Step 3 – Reboot
You will now need to reboot the system and log back in as root. If you have an active SSH session, this will be lost and you will need to reconnect after the system reboots.
reboot
Step 4 – Resize the Partition
The last and final step is to resize the file system. Once the system has rebooted and you are logged back in as root, issue the following command and wait until it completes.
resize2fs /dev/mmcblk0p2
That should be it. If you log into the OpenRepeater Web Interface and look at the disk usage, you should see you have more space now.